Ideal Evomax 2 Installation Manual: Overview
This manual details the Evomax 2’s setup, encompassing site prep, mounting, connections, and testing. Discover lodging, visitor centers, and activities near Mount Rainier for service support.
Understanding the Evomax 2 System
The Evomax 2 is a sophisticated system designed for optimal performance, requiring careful installation. It integrates seamlessly into various environments, offering reliable operation. Consider nearby communities like Ashford and Eatonville for potential service access. This manual guides you through each step, ensuring a successful setup.
Mount Rainier’s surrounding areas provide convenient lodging options. Familiarize yourself with the system’s components and their functions before beginning. Proper understanding is crucial for safe and efficient installation, maximizing the Evomax 2’s capabilities and longevity. Explore visitor information centers for regional support.
Safety Precautions During Installation
Prioritize safety throughout the Evomax 2 installation process. Always disconnect power before commencing electrical work. Wear appropriate personal protective equipment, including safety glasses and gloves. Ensure the work area is well-ventilated. Be mindful of potential hazards during wall mounting and plumbing connections.
If working near Mount Rainier, be aware of changing weather conditions. Consult local visitor information centers for updates. Improper installation can lead to system malfunction or injury. Follow all instructions carefully and seek professional assistance if needed. Prioritize a secure and stable installation environment.

Pre-Installation Requirements
Careful preparation is key! Verify necessary tools, check package contents, and prepare the installation site, considering ventilation and proximity to Mount Rainier areas.
Tools Needed for Installation
Ensuring a smooth installation requires specific tools. You will need a standard screwdriver set (Phillips and flathead), an adjustable wrench, a level to guarantee proper alignment, and a drill with appropriate bits for your wall type.
A voltage tester is crucial for electrical safety, alongside wire strippers and crimpers for secure connections. Measuring tape, a pencil for marking, and safety glasses are also essential.
Depending on plumbing needs, pipe wrenches and Teflon tape may be required. Consider having a stud finder for wall mounting, and remember to check lodging options near Mount Rainier if a tool run is needed!
Checking Package Contents
Verify all components are present before beginning installation. The package should include the Evomax 2 unit itself, the control panel, and all necessary mounting hardware – brackets, screws, and anchors.
Inspect the wiring harness, plumbing fittings (if applicable), and the user manual for completeness. Confirm the presence of any included sensors or calibration tools.
Carefully examine each item for shipping damage. If anything is missing or damaged, contact customer support immediately. Planning a trip to Mount Rainier? Ensure all parts are here before heading out for lodging!
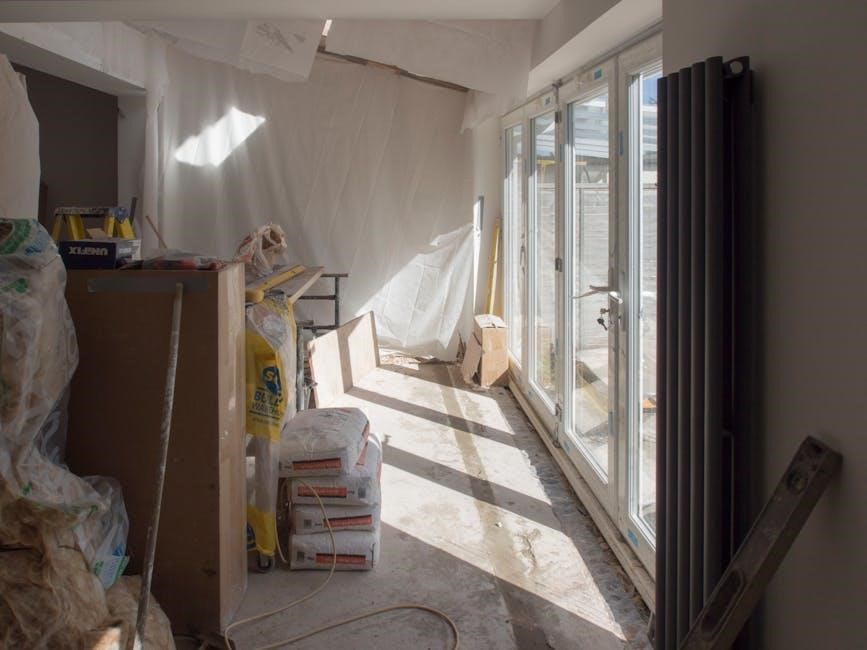
Site Preparation and Location Considerations
Select a location that meets the Evomax 2’s operational requirements. Ensure the area can support the unit’s weight and provides adequate space for maintenance access. Consider proximity to power sources and, if needed, water supply lines.
Verify the floor or wall can withstand the mounting process. Proper ventilation is crucial; avoid enclosed spaces.
If visiting Mount Rainier, remember similar planning applies to your stay – consider access to amenities! A stable, level surface is essential for optimal performance and longevity of the Evomax 2 system.
Mounting the Evomax 2 Unit
Securely affixing the Evomax 2 is vital. Wall mounting requires appropriate hardware and consideration for ventilation, similar to planning lodging near Mount Rainier.
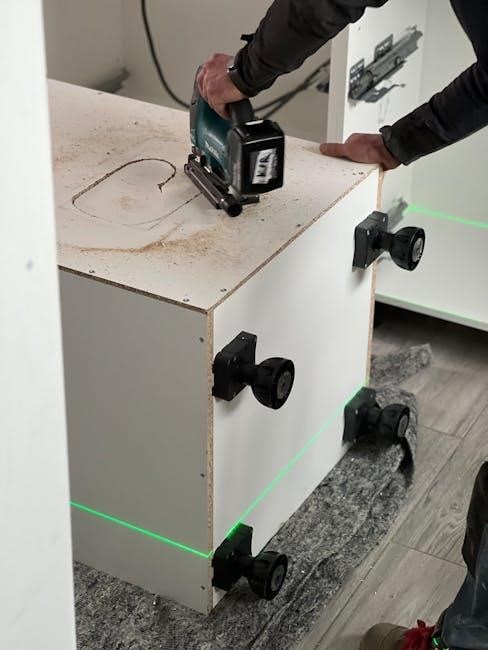
Wall Mounting Procedures
Prior to commencing, verify the wall’s structural integrity to support the Evomax 2’s weight. Utilize a stud finder to locate wall studs for secure anchoring; drywall alone is insufficient. Mark the desired mounting location, ensuring adequate space for ventilation and future servicing, much like considering access to Mount Rainier attractions.
Employ appropriately sized mounting brackets, compatible with both the Evomax 2 and the wall type. Pre-drill pilot holes to prevent splitting the wood. Carefully align the unit with the brackets and fasten securely with screws or bolts, ensuring a flush and stable mount; Double-check all connections for tightness.
Securing the Unit to the Wall
After initial bracket attachment, confirm the Evomax 2 is level using a spirit level. Adjust as needed before fully tightening all fasteners – similar to ensuring a stable base for exploring Mount Rainier’s trails. Employ locking washers to prevent loosening from vibrations, especially crucial in areas prone to seismic activity.
Inspect the mounting points for any signs of stress or weakness. Reinforce if necessary, potentially adding additional brackets or utilizing heavier-duty hardware. A secure mount is paramount for safe operation and longevity, mirroring the importance of reliable lodging near the park.
Ensuring Proper Ventilation
Adequate airflow is critical for optimal Evomax 2 performance and preventing overheating, much like the fresh mountain air around Mount Rainier. Maintain a minimum clearance of 12 inches around all sides of the unit. Avoid obstructing vents with objects or insulation.
Consider the ambient temperature of the installation location; hotter environments require increased ventilation. Regularly inspect vents for dust accumulation and clear as needed. Proper ventilation extends the lifespan of the unit, similar to well-maintained visitor information centers offering lasting service.
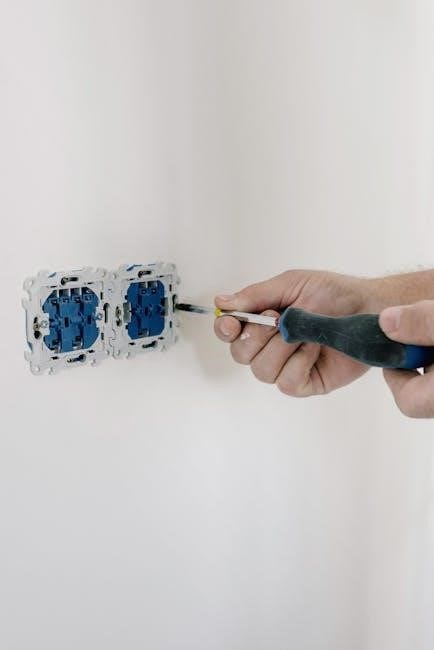
Electrical Connections
Carefully follow the wiring diagram, ensuring proper grounding and connection to the power supply. Like planning a trip to Mount Rainier, precision is key.
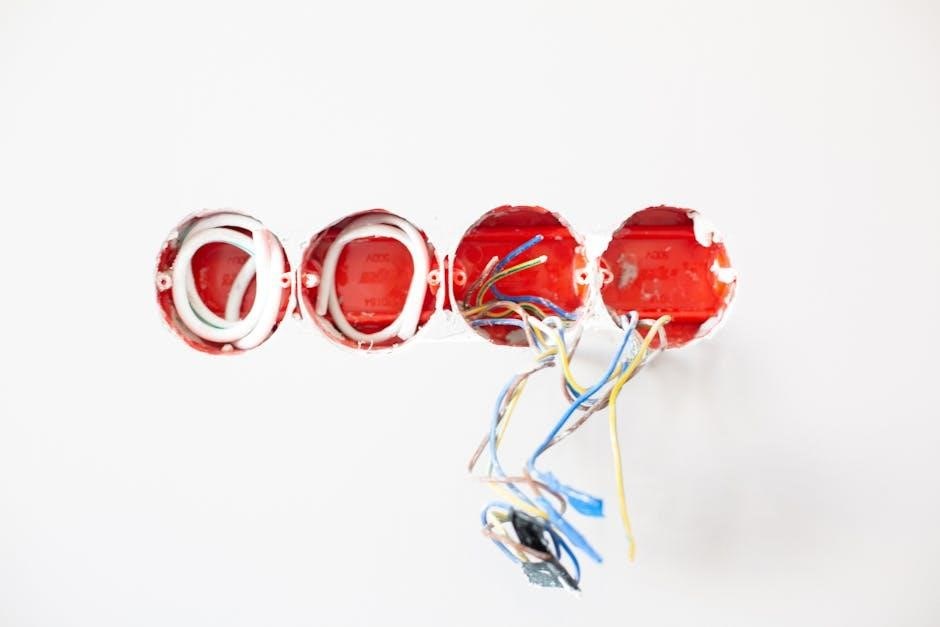
Wiring Diagram Explanation
The Evomax 2 wiring diagram illustrates the precise connections for safe and efficient operation. It details the live, neutral, and ground wires, alongside any required fusing or circuit breaker specifications.
Pay close attention to color coding and terminal designations to avoid miswiring, which could damage the unit or pose a safety hazard.
Similar to navigating the trails around Mount Rainier, a clear understanding of the path is crucial.
Double-check all connections before applying power, and consult a qualified electrician if unsure about any aspect of the wiring process. Proper installation ensures longevity.
Grounding the Evomax 2
Proper grounding is paramount for safety and optimal performance of the Evomax 2. Connect the designated ground wire – typically green or bare copper – to a verified earth ground, adhering to local electrical codes.
This provides a safe path for fault currents, preventing electrical shock and minimizing equipment damage.
Like the solid foundation of Mount Rainier itself, a robust ground connection is essential for stability.
Ensure the grounding connection is secure and free of corrosion. Incorrect grounding voids the warranty and creates a significant hazard.
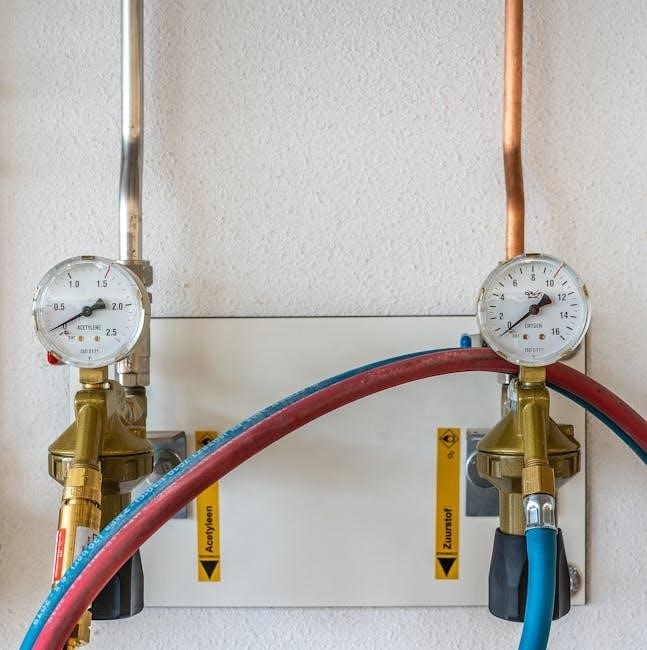
Connecting to Power Supply
Before connecting, verify the Evomax 2’s voltage requirements match your power supply. Use a dedicated circuit breaker sized appropriately for the unit’s power draw. Carefully connect the power wires – typically black for hot, white for neutral, and green/bare for ground – to the designated terminals.
Double-check all connections for tightness and correct polarity;
Like planning a trip to Mount Rainier, meticulous preparation is key.
Ensure the power supply is switched off during connection. Improper wiring can cause damage or create a fire hazard.
Plumbing Connections (If Applicable)
Connect water supply lines securely, ensuring proper drainage setup. Thorough leak testing is crucial, similar to exploring waterfalls near Mount Rainier’s Nisqually Entrance.
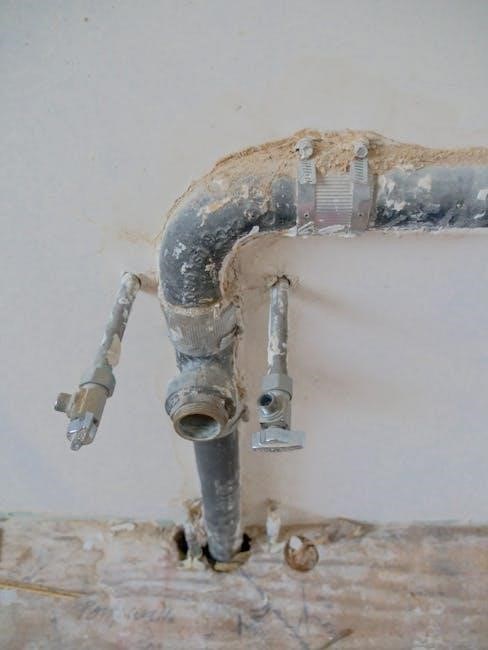
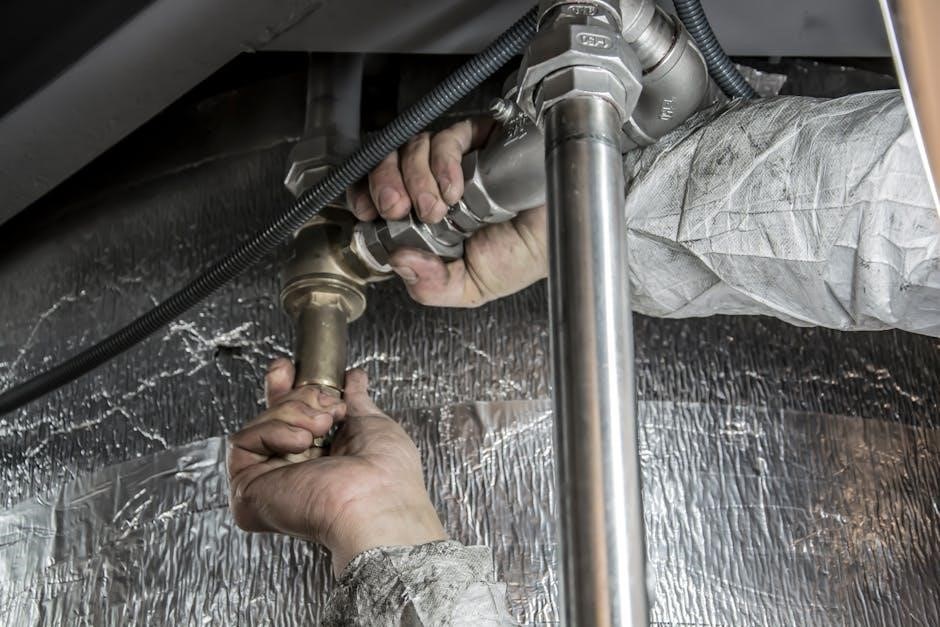
Water Supply Line Connection
Carefully connect the Evomax 2 to the designated water supply line, utilizing appropriate fittings and ensuring a watertight seal. Prior to connection, thoroughly flush the supply line to remove any debris that could potentially damage the unit’s internal components.
Employ Teflon tape on all threaded connections to prevent leaks and maintain optimal pressure. Verify the water pressure aligns with the Evomax 2’s specifications; excessive pressure may necessitate a pressure regulator. Like planning a trip to Mount Rainier, meticulous preparation is key. Double-check all connections before proceeding.
Drainage Setup
Proper drainage is crucial for the Evomax 2’s efficient operation. Connect the unit to a suitable drainage system, ensuring a consistent downward slope to prevent backflow and maintain optimal performance. Utilize appropriately sized drainage pipes, adhering to local plumbing codes and regulations.
Secure all connections tightly to avoid leaks, similar to ensuring a secure lodging near Mount Rainier. Regularly inspect the drainage line for obstructions or damage. A well-maintained drainage system prevents issues and extends the Evomax 2’s lifespan, just like planning for activities in the region.
Leak Testing Procedures
Thorough leak testing is essential post-plumbing connection. Slowly introduce water into the Evomax 2 system, carefully monitoring all joints, connections, and the drainage line for any signs of leakage. Apply gentle pressure, mirroring the system’s operational level, and visually inspect for drips or moisture.
Address any detected leaks immediately by tightening connections or replacing faulty components. This meticulous process, like finding ideal lodging near Mount Rainier, ensures long-term reliability and prevents potential water damage. Document all testing results for future reference and maintenance records.
Control Panel Setup
Connect the control panel, configure initial settings, and rigorously test all functionalities. Explore nearby Mount Rainier attractions during downtime after setup!
Connecting the Control Panel
Carefully attach the provided control panel cable to the designated port on the Evomax 2 unit and the control panel itself. Ensure a secure connection to prevent signal interruption during operation. Refer to the wiring diagram for correct pin assignments.
Power on the control panel and verify the display illuminates. Initial communication between the Evomax 2 and the control panel establishes system awareness. If no display appears, double-check the power supply and cable connections. Consider exploring the Mount Rainier region for inspiration while troubleshooting!
Initial Configuration of Settings
Upon successful connection, navigate the control panel menu to access the settings configuration. Input essential parameters like date, time, and desired operating units. Customize alarm thresholds and operational schedules to match specific requirements.
Review all settings carefully before saving, ensuring accuracy. Consider a trip to Mount Rainier’s visitor centers for a refreshing break during setup! Proper configuration optimizes performance and ensures reliable system operation. Save changes and proceed to functionality testing.
Testing Control Panel Functionality
After configuration, rigorously test all control panel features. Verify responsiveness of buttons, displays, and alarm indicators. Simulate operational scenarios to confirm correct system behavior. Check remote access capabilities, if applicable, ensuring seamless communication.
Document all test results for future reference. Perhaps plan a visit to Ashford or Packwood near Mount Rainier to review findings! Address any discrepancies immediately. Successful testing guarantees reliable control and monitoring of the Evomax 2 system.
Software Installation & Configuration
Download and install the Evomax 2 software, then configure settings for optimal performance. Explore nearby Mount Rainier attractions during the process!
Downloading Necessary Drivers
Before installing the Evomax 2 software, ensure you have the latest drivers for seamless communication between the unit and your computer. These drivers are crucial for recognizing the hardware and enabling full functionality.
Visit the official Evomax website – a secure source – to locate the driver package specifically designed for your operating system (Windows, macOS, or Linux). Carefully select the correct version to avoid compatibility issues.
Download the driver file and save it to a readily accessible location, such as your desktop. Remember to disconnect the Evomax 2 unit from the power supply during the driver installation process for safety and to prevent potential conflicts.
Installing the Evomax 2 Software
With the necessary drivers downloaded, proceed to install the Evomax 2 software. Locate the downloaded installation file and double-click to initiate the setup wizard. Follow the on-screen prompts carefully, accepting the license agreement and choosing your preferred installation directory.
The installer will guide you through the process, automatically detecting the connected Evomax 2 unit. Ensure the unit is powered on and properly connected to your computer via USB.
Allow the installation to complete fully before launching the software. A successful installation will create a desktop shortcut for easy access.
Configuring Software Settings
Upon launching the Evomax 2 software, initial configuration is crucial for optimal performance. Begin by navigating to the ‘Settings’ menu, typically found under ‘File’ or ‘Options’. Here, you’ll configure parameters like unit preferences, data logging intervals, and alarm thresholds.
Customize display settings to your preference, adjusting units of measurement and data visualization options. Explore the advanced settings for fine-tuning control parameters.
Remember to save your configurations frequently to prevent data loss. Consider exploring the Mount Rainier region for potential service needs.

System Testing and Calibration
Post-installation, rigorous testing and calibration are vital. Verify sensor accuracy and control responsiveness, ensuring optimal Evomax 2 functionality near Mount Rainier.
Running Initial System Tests
Following installation, initiate comprehensive system tests to validate proper operation. Begin with a power-on self-test, observing indicator lights and listening for any unusual noises. Subsequently, cycle through all operational modes, confirming each function performs as expected.
Verify control panel responsiveness and software connectivity. If plumbing is involved, meticulously check for leaks during operation. Document all test results, noting any discrepancies or anomalies. Remember, areas like Ashford and Packwood offer support if needed. These initial tests are crucial for identifying and addressing potential issues before full deployment, ensuring long-term reliability and performance, especially considering the diverse environments around Mount Rainier.
Calibrating Sensors and Controls
Accurate calibration of sensors and controls is paramount for optimal Evomax 2 performance. Utilize the software interface to access calibration routines, following on-screen prompts carefully. Compare sensor readings against known standards, adjusting as necessary to minimize discrepancies.
Fine-tune control parameters to achieve desired operational characteristics. Document all calibration settings for future reference and troubleshooting. Consider the varying conditions near Mount Rainier – from Greenwater to Crystal Mountain – when establishing calibration baselines. Proper calibration ensures consistent, reliable operation and maximizes system efficiency, potentially reducing the need for service calls in remote locations.
Troubleshooting Common Issues
Addressing common issues promptly minimizes downtime. Check power connections and wiring diagrams first. Verify control panel settings and software configurations. Inspect plumbing connections for leaks, especially crucial given the rainfall near Mount Rainier.
If sensors display inaccurate readings, recalibrate them following the procedures outlined earlier. For software errors, reinstall drivers or contact technical support. Remember, access to Ashford or Packwood may be limited during peak seasons, so proactive troubleshooting is key. Document all issues and resolutions for future reference, aiding in efficient service.
Mount Rainier Region Information (Related to potential service area)
Service technicians may find lodging in Ashford, Eatonville, or Mineral. Explore Mount Rainier’s attractions during downtime, including hiking and visitor centers.
Lodging Options Near Mount Rainier
For technicians requiring overnight stays during Evomax 2 installations, several convenient lodging options exist near Mount Rainier National Park. Ashford, a popular choice, offers a range of hotels and vacation rentals, providing easy access to the Nisqually Entrance.
Eatonville and Elbe present more secluded accommodations, while Mineral boasts charming bed and breakfasts. The Crystal Carriage House, a vacation rental, accommodates up to four guests. Consider proximity to service locations and desired amenities when booking. Planning ahead is recommended, especially during peak seasons, to secure preferred lodging.
Visitor Information Centers
Technicians servicing the Evomax 2 in the Mount Rainier region may find Visitor Information Centers helpful for local resources and support. Centers are located within Mount Rainier National Park, offering park-specific details and trail information.
Additional centers exist in Enumclaw and Packwood, providing broader regional knowledge. These locations can assist with directions, local services, and emergency contacts. Utilizing these resources ensures efficient travel and problem-solving during installations and maintenance visits. Consult Visit Rainier for updated locations and operating hours.
Activities and Attractions in the Area
For Evomax 2 technicians traveling to the Mount Rainier area, understanding local attractions can aid in scheduling and downtime planning. The region boasts diverse activities, including hiking, biking, and camping, with Mount Rainier offering 14,410 feet of adventure.
Explore waterfalls, scenic byways, and nearby ski resorts like Crystal Mountain. These options provide opportunities for relaxation and exploration after installation or service calls. Visit Rainier offers detailed itineraries and information to maximize your time in the area.

Post-Installation Maintenance
Regular cleaning, filter replacements, and system monitoring are crucial for optimal Evomax 2 performance. Explore Mount Rainier’s attractions during scheduled maintenance visits.
Regular Cleaning Procedures
Maintaining a clean Evomax 2 unit is vital for efficiency and longevity. Dust accumulation can impede airflow and sensor accuracy, so weekly wiping of exterior surfaces with a soft, dry cloth is recommended.
For internal components, consult the detailed cleaning schedule within the full manual. Avoid abrasive cleaners or solvents, as these can damage sensitive parts. Periodic inspection of ventilation areas ensures unobstructed airflow.
Remember to disconnect power before any internal cleaning. While in the Mount Rainier region for maintenance, consider exploring local lodging options in Ashford or Packwood!
Filter Replacement Schedule
Optimal Evomax 2 performance relies on timely filter replacements. Air filters should be checked monthly and replaced every 3-6 months, depending on operating conditions and dust levels. Water filters, if applicable, require replacement every 6-12 months, or as indicated by the system’s monitoring alerts.
Using genuine Evomax 2 filters ensures compatibility and maintains system efficiency. Detailed replacement instructions are found in the full manual.
Planning maintenance near Mount Rainier? Explore visitor information centers in Enumclaw for local insights while servicing your unit!
Long-Term System Monitoring
Consistent monitoring is crucial for sustained Evomax 2 operation. Regularly review system logs for error messages or performance deviations. Utilize the software interface to track key metrics like energy consumption and operational hours. Schedule annual professional inspections to identify potential issues before they escalate.
Proactive maintenance, similar to planning a trip to Mount Rainier, ensures reliability. Consider lodging in Ashford for convenient access during service visits.
Document all maintenance activities and retain records for warranty purposes and future troubleshooting.