
Emerson SmartSet Clock Instructions
The Emerson SmartSet Clock features an automatic time setting system, dual alarms, FM radio, USB charging, and Bluetooth connectivity. It automatically adjusts for daylight saving and leap years. Follow the manual for setup, safety precautions, and optimal performance.
The Emerson SmartSet Clock is a cutting-edge timekeeping device designed for convenience and efficiency. It features Emerson’s patented SmartSet Automatic Time Setting System, which ensures the clock automatically updates to the correct time, date, and year upon connection to a power source. This innovative technology eliminates the need for manual adjustments, making it a user-friendly solution for everyday use. The clock boasts a sleek design with a large, easy-to-read display and offers multiple features such as dual alarms, FM radio functionality, Bluetooth connectivity, and a USB charge-out port for charging mobile devices.
Additional features include a night light for low-light conditions and automatic adjustments for daylight saving time and leap years. The SmartSet Clock is designed to be energy-efficient and comes with safety precautions to prevent damage or interference. Its versatility and advanced features make it an ideal choice for those seeking a reliable and modern clock radio. With its robust functionality and ease of use, the Emerson SmartSet Clock is a practical addition to any home or office setting.
Importance of Following the Instructions
Adhering to the Emerson SmartSet Clock instructions is crucial for proper functionality, safety, and optimal performance. The manual provides essential guidelines to ensure the clock operates correctly and efficiently. By following the instructions, users can avoid potential issues such as incorrect time settings, alarm malfunctions, or damage to the device. The SmartSet system relies on accurate initial setup to automatically adjust time zones, daylight saving changes, and leap year updates. Neglecting these steps may result in operational errors or failure to maintain the correct time. Additionally, safety precautions outlined in the manual, such as proper handling of batteries and avoiding exposure to moisture, are vital to prevent hazards. Failure to comply with these warnings could lead to electrical issues or personal injury. Following the instructions also ensures compliance with FCC and RF exposure guidelines, which are critical for maintaining proper device operation and user safety. Proper setup and maintenance as per the manual will extend the lifespan of the clock and ensure it continues to meet your needs effectively.
Warnings and Safety Precautions
When using the Emerson SmartSet Clock, it is essential to follow all safety precautions to avoid potential hazards. The clock should not be exposed to water, moisture, or extreme temperatures, as this could cause electrical malfunctions or damage. Avoid using the device near swimming pools, bathtubs, or in humid environments. Additionally, the clock should not be exposed to direct sunlight or placed near open flames, as this could lead to overheating or fire risks. Always ensure the plug is fully inserted into the outlet to prevent blade exposure, which could result in electrical shock. Do not use the clock with an extension cord unless the blades are fully inserted and there is no exposure. The clock contains a lithium battery, which should be handled with care. If the battery compartment does not close securely, discontinue use and keep it away from children. In case of battery ingestion, seek immediate medical attention, as it can cause severe internal burns. Follow all FCC and RF exposure guidelines to maintain compliance and avoid interference with other devices. These precautions ensure safe and reliable operation of your Emerson SmartSet Clock.
Initial Setup and Unpacking
Begin by carefully unpacking your Emerson SmartSet Clock from its box. Ensure all components, such as the clock, power cord, and any additional accessories, are included. Before plugging in the clock, place it on a stable, flat surface away from direct sunlight or moisture. The clock features non-skid rubber feet to prevent movement and protect your furniture from marks. For added protection, consider applying self-adhesive felt pads to the feet if placing it on fine wood surfaces. Next, connect the clock to a live AC outlet using the provided power cord. Avoid using extension cords unless necessary, as this could pose a safety risk. Once powered on, the SmartSet system will automatically set the time, date, and year based on the Eastern Time Zone by default. If you live outside this zone, you will need to adjust the time zone manually. The clock also features a night light, which can be turned on or off as needed. Allow a few seconds for the clock to initialize and display the correct information. This initial setup ensures your clock is ready for everyday use. Proper unpacking and placement are crucial for optimal performance and longevity.
Understanding the SmartSet Automatic Time Setting System
The Emerson SmartSet Automatic Time Setting System is a revolutionary feature designed to simplify time management. Upon initial power connection, the clock automatically sets the correct time, date, and year based on the Eastern Time Zone. This process occurs within seconds and ensures accuracy without manual input. The system also automatically adjusts for daylight saving time and leap years, eliminating the need for seasonal manual updates. After a power interruption, the internal lithium battery maintains the time and alarm settings, ensuring uninterrupted functionality. The SmartSet system recognizes seven pre-programmed time zones, allowing users to easily switch to their local time zone if needed. This feature is particularly useful for travelers or those living outside the Eastern Time Zone. The clock’s internal computer continuously updates, ensuring it always displays the correct time. This automation enhances user convenience, reducing the likelihood of errors and saving time. The SmartSet system is a key feature that sets the Emerson clock apart from traditional time-keeping devices, offering reliability and ease of use.

Connecting the Clock to the Power Source
To connect your Emerson SmartSet Clock to the power source, ensure you use a 120V 60Hz AC power outlet. Avoid using extension cords unless the plug’s blades can be fully inserted without exposure. Never expose the clock to rain or moisture to prevent damage. The clock should be plugged into an outlet that remains always live, not controlled by a wall switch. This ensures continuous operation and maintains the internal lithium battery, which kicks in during power interruptions to preserve time and alarm settings. For optimal performance, keep the clock connected to a live AC outlet to maximize battery life. Upon initial connection, the SmartSet system automatically sets the time, date, and year, eliminating the need for manual setup. Follow these guidelines to ensure safe and proper functionality of your Emerson SmartSet Clock. Proper power connection is crucial for maintaining the clock’s advanced features and reliability. Always adhere to the provided safety precautions to avoid potential hazards and ensure long-term performance. By following these steps, you can enjoy uninterrupted use of your Emerson SmartSet Clock.
First-Time Setup and Default Time Zone
Upon connecting the Emerson SmartSet Clock to power, the internal computer automatically sets the time, date, and year based on the Eastern Time Zone. This is the default setting, so no initial adjustments are needed if you’re in this zone. The display will briefly scan before showing the correct time. If you reside outside the Eastern Time Zone, you must manually adjust the time zone. The SmartSet system offers seven predefined zones to choose from. Once set, the clock retains this information even after power interruptions. To ensure accuracy, avoid manually adjusting the time, as the system automatically handles daylight saving and leap year changes. After initial setup, the clock operates seamlessly, maintaining precise timekeeping. Always refer to the user manual for detailed zone adjustment instructions to ensure proper functionality. Proper initial setup guarantees optimal performance and eliminates the need for frequent manual corrections. By following these steps, you can enjoy reliable timekeeping tailored to your location. The SmartSet system simplifies clock setup, making it user-friendly and efficient. First-time setup is designed to be straightforward, ensuring a hassle-free experience.
Setting the Correct Time Zone
To ensure accurate timekeeping, the Emerson SmartSet Clock allows you to set the correct time zone. The clock is pre-programmed with seven time zones: Pacific, Mountain, Central, Eastern, Alaska, Hawaii, and Atlantic. Upon initial setup, the clock defaults to the Eastern Time Zone. If you reside in a different zone, press and hold the TIME ZONE button until the zone abbreviation (e.g., PST, MST) appears on the display. Use the UP or DOWN buttons to cycle through the options and select your zone. Once set, the clock will automatically adjust the time and date for your location. This setting is retained even after power interruptions, ensuring consistent accuracy. Note that manual time adjustments are unnecessary, as the SmartSet system handles daylight saving and leap year changes automatically. For optimal performance, avoid overriding the automatic settings unless absolutely necessary. If you ever need to reset the time zone, repeat the process to select the correct zone. This feature ensures your clock remains synchronized with your location, providing reliable timekeeping.
Understanding the Time Display Format
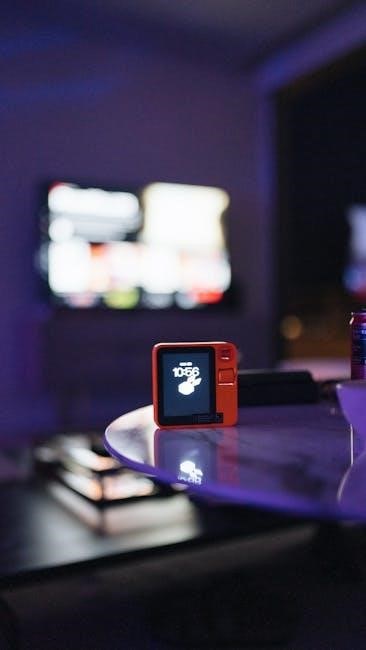
The Emerson SmartSet Clock features a clear 1.4-inch blue jumbo display, showing the time in a 12-hour format with AM/PM indicators. The display also shows the date and day of the week. When you press the TIME SET button, the display cycles through the year, date, and time. The default time zone is Eastern, but you can adjust it to one of seven pre-programmed zones. The clock automatically updates for daylight saving and leap years, ensuring accuracy. The display brightness can be adjusted to high, medium, or low settings in standby, radio, or AUX modes by pressing the ZZZ button. This feature helps maintain visibility without excessive glare. The time display is synchronized with the SmartSet system, eliminating the need for manual adjustments. The clear layout and intuitive design make it easy to read and understand the time, date, and other information at a glance. This ensures a seamless user experience and reliable timekeeping.
Though the Emerson SmartSet Clock automatically sets the time, manual adjustments are possible if needed. Press and hold the TIME SET button until the display flashes, then use the UP or DOWN buttons to adjust the time. Press TIME SET to save changes. To set the year, date, or time individually, press TIME SET once for each desired field. The clock will revert to clock mode after 5 seconds of inactivity. For daylight saving or leap year adjustments, the SmartSet system handles these automatically. Manual overrides are not necessary. Always refer to the manual for detailed instructions to ensure correct adjustments and maintain accurate timekeeping. Proper use of these features ensures the clock remains reliable and user-friendly. The Emerson SmartSet Clock automatically handles Daylight Saving and Leap Year adjustments, ensuring accurate timekeeping without manual intervention. For Daylight Saving, the clock advances to 3:00 AM on the 2nd Sunday in March and reverts to 2:00 AM on the 1st Sunday in November. These changes occur seamlessly, eliminating the need for user input. Leap Year adjustments are also managed internally, with the clock displaying February 29th on a Leap Year. The SmartSet system ensures smooth transitions, maintaining correct time and date settings. Manual overrides are unnecessary, as the clock’s internal computer processes these adjustments automatically. To ensure uninterrupted operation, keep the clock connected to a power source, as the built-in lithium battery maintains settings during power outages. This feature-rich design ensures reliability and convenience, making the Emerson SmartSet Clock a user-friendly timekeeping solution. To set the alarm on your Emerson SmartSet Clock, follow these steps: This ensures your alarm is set correctly and ready for use. To customize your alarm experience, adjust the volume and snooze settings on your Emerson SmartSet Clock: These adjustments enhance your alarm functionality, ensuring a tailored wake-up experience. To enjoy the FM radio on your Emerson SmartSet Clock, follow these steps: This feature enhances your entertainment experience, providing easy access to live radio broadcasts. Tuning and saving your favorite FM radio stations on the Emerson SmartSet Clock is straightforward. Repeat this process to save up to five favorite stations. To recall a saved station, simply press the corresponding preset number button. This feature allows quick access to your preferred stations without manual tuning each time. For optimal reception, ensure the clock is placed in an area with minimal interference and avoid moving it excessively while tuning. This feature enhances your listening experience, making it convenient to enjoy your favorite radio stations whenever you want. To use the Bluetooth speaker function on your Emerson SmartSet Clock, follow these steps: The Bluetooth function allows you to enjoy high-quality audio from your devices through the clock’s speaker. Ensure your device is within range for optimal connectivity. Connecting your audio device to the Emerson SmartSet Clock using the AUX input is straightforward: Using the AUX input allows you to play music from devices without Bluetooth capability, ensuring compatibility with a wide range of audio sources. Ensure the cable is fully inserted for optimal sound quality. The Emerson SmartSet Clock includes a convenient USB charge out port, allowing you to charge your mobile devices while keeping the clock powered. To use this feature: Always ensure the clock is properly plugged into a power source to avoid draining the internal lithium battery. This feature is perfect for keeping your devices charged while maintaining a clutter-free bedside setup. To customize the display brightness on your Emerson SmartSet Clock, follow these simple steps: This feature ensures optimal visibility in both bright and low-light environments, such as a bedroom. Adjusting the brightness helps reduce eye strain and enhances the overall user experience. The SmartSet technology automatically maintains these settings, providing consistent display clarity at all times. The Emerson SmartSet Clock includes a convenient Night Light feature, designed to provide soft illumination in low-light environments. To activate the night light, simply press the “NIGHT LIGHT” button located on the top of the clock. This will turn on a gentle blue LED light, which is easy on the eyes and provides enough light to navigate your room without causing glare. The night light is especially useful for midnight wake-ups or for creating a soothing ambiance in your bedroom. Press the “NIGHT LIGHT” button again to turn it off. The feature is independent of other functions and does not interfere with the clock’s display brightness settings. This makes it a versatile addition to the clock’s functionality, ensuring you have light when you need it most. By incorporating the Night Light feature, Emerson has enhanced the clock’s usability, making it a practical and user-friendly addition to your home. This feature complements the clock’s other functions, such as the display brightness adjustment and alarm settings, ensuring a seamless and convenient experience. To ensure your Emerson SmartSet Clock operates optimally, regular maintenance is essential. Start by cleaning the clock with a soft, dry cloth to remove dust and fingerprints, which can affect the display’s visibility. Avoid using harsh chemicals or abrasive materials, as they may damage the finish or harm the screen. Protect the clock from exposure to liquids, moisture, or extreme temperatures, as these can cause internal damage. Additionally, ensure the clock is placed on a stable surface away from direct sunlight to prevent overheating. For furniture protection, consider applying self-adhesive felt pads to the rubber feet to avoid marks or stains. Check the battery compartment periodically to ensure it is clean and free from corrosion. If batteries are used, replace them with the correct type to avoid damage. For the USB charge-out feature, avoid overloading the port with high-current devices to maintain its functionality. Store the clock in a cool, dry place when not in use. If moving the clock, handle it carefully to prevent physical damage; Regularly updating the clock’s settings after power interruptions ensures accurate timekeeping. By following these care tips, you can extend the lifespan of your Emerson SmartSet Clock and maintain its performance. If your Emerson SmartSet Clock experiences issues, start by checking the power connection. Ensure it is plugged into a live AC outlet, as the clock may not function correctly if connected to a switched outlet. If the time is incorrect, verify your time zone setting or reset the clock by disconnecting and reconnecting the power supply. For radio reception problems, reposition the clock or adjust the antenna to improve signal strength. If the display is dim or flickering, clean the screen with a soft cloth and ensure the brightness settings are adjusted properly. If alarms fail to activate, check the alarm volume, snooze settings, and ensure the alarm is enabled for the correct days. Bluetooth connectivity issues can be resolved by restarting both the clock and the connected device, then pairing them again. For USB charging problems, ensure the port is clean and free from debris. If issues persist, reset the clock to factory settings by holding the reset button for five seconds while powered on. Always refer to the user manual for specific troubleshooting steps to resolve common issues effectively. To reset your Emerson SmartSet Clock to factory settings, press and hold the “RESET” button located at the back or bottom of the clock for 5-10 seconds while the clock is powered on. This will restore all settings to their default values, including time, alarms, and radio presets. After resetting, the clock will automatically set the time for the Eastern Time Zone. If you live in a different time zone, you will need to adjust it manually. Note that resetting will erase all custom settings, including alarms and saved radio stations, so you will need to reprogram them after the reset. Performing a factory reset is useful if the clock experiences persistent issues or if you want to start fresh with the device. Ensure the clock remains plugged into a live AC outlet during the reset process to maintain power. Once completed, the clock will restart and be ready for initial setup again. Always refer to the user manual for specific reset instructions, as the location of the reset button and exact steps may vary slightly depending on the model of your Emerson SmartSet Clock. Your Emerson SmartSet Clock is protected by a limited warranty provided by Emerson Radio Corp. This warranty covers defects in materials and workmanship for a period of one year from the date of original purchase. During this time, Emerson will repair or replace any defective part free of charge, provided the product has been used in accordance with the provided instructions. The warranty does not cover damage resulting from misuse, improper installation, accidents, or exposure to extreme conditions such as moisture or excessive heat. Additionally, the warranty does not apply to products that have been altered or tampered with in any way. To make a warranty claim, contact Emerson’s customer service department with your proof of purchase and a detailed description of the issue. They will guide you through the process of obtaining repair or replacement. Note that the warranty is valid only for the original purchaser and is non-transferable. For more information, refer to the warranty section in your user manual or visit Emerson’s official website. Emerson stands behind the quality of its products and is committed to providing reliable service under this warranty agreement. The warranty also complies with all applicable FCC regulations and industry standards, ensuring your SmartSet Clock meets quality and safety expectations.Manual Time Adjustments
Daylight Saving and Leap Year Adjustments

Setting the Alarm
Ensure the clock is in standby mode (radio, Bluetooth, and AUX functions are off).
Press and hold the AL1 or AL2 button.
While holding the AL button, press the DOWN or UP button to select the desired alarm timing.
Choose from Weekdays (Monday to Friday), Weekends (Saturday and Sunday), or Everydays (Monday to Sunday).
After selecting the days, set the alarm time using the number buttons.
Save your settings by pressing the AL button again or waiting a few seconds.
To use the Snooze function, press the Snooze button when the alarm sounds, pausing it for 9 minutes.
To turn off the Snooze mode, press the Power button once. Adjusting Alarm Volume and Snooze Function
The alarm volume can be adjusted by pressing the VOLUME UP or VOLUME DOWN buttons.
The snooze function allows you to pause the alarm for 9 minutes. Press the SNOOZE button when the alarm is active.
To deactivate the snooze mode, press the POWER button.
The alarm will not repeat after one snooze cycle, ensuring uninterrupted sleep beyond the initial pause.
Volume levels can be set independently for the alarm and radio modes, providing flexibility based on your preferences.
For optimal performance, ensure the clock is connected to a live AC outlet to maintain settings during power interruptions. Using the FM Radio Feature

Press the POWER button to turn on the device.
Use the SOURCE button to select the FM radio mode.
Tune into your desired station by pressing the UP or DOWN arrows.
To save a favorite station, press and hold the MEMORY button until a number appears on the display, then release.
Adjust the volume using the VOLUME UP or VOLUME DOWN buttons.
The radio feature allows you to listen to your favorite stations with clear sound quality. For optimal reception, ensure the clock is placed away from interference sources. Tuning and Saving Favorite Radio Stations
Press the POWER button to turn on the device.
Use the SOURCE button to select the FM radio mode.
Press the UP or DOWN arrows to scan through available stations.
Once you find a station you like, press and hold the MEMORY button until a preset number (1-5) appears on the display.
Release the button to save the station to the selected preset. Using the Bluetooth Speaker Function


Connecting Devices via AUX Input
Using the USB Charge Out Feature
Adjusting the Display Brightness
Using the Night Light Feature
Caring for the Clock and Maintenance Tips
Troubleshooting Common Issues

Resetting the Clock to Factory Settings
Warranty Information